Launching A WordPress Application With MYSQL Database in K8S Cluster On AWS Using Ansible

Now let’s start this Project;
Steps for this project:
- Launch 3 ec2-instances on AWS using Ansible.
- configure k8s cluster , one as master and two nodes as server/slave node
- use dynamic inventory to get ip of all the aws instances.
- then launch wordpress and mysql
- and finally expose the wordpress to connect to public world.
Step 1:
Creating an ansible playbook to launch ec2-instance;
Here created a file named , ec2_k8s.yml


yml file to launch ec2-instance
Now you can check the ec2 dashboard you will be finding that three instances are created.
Step 2:

Now after launching the ec2-instances configure instances for k8s cluster setup;
What is Kubernetes?
Kubernetes is a portable, extensible, open-source platform for managing containerized workloads and services, that facilitates both declarative configuration and automation. It has a large, rapidly growing ecosystem. Kubernetes services, support, and tools are widely available.
The name Kubernetes originates from Greek, meaning helmsman or pilot. Google open-sourced the Kubernetes project in 2014. Kubernetes combines over 15 years of Google’s experience running production workloads at scale with best-of-breed ideas and practices from the community
What is kubernetes Cluster
Kubernetes clusters allow containers to run across multiple machines and environments: virtual, physical, cloud-based, and on-premises. Kubernetes containers are not restricted to a specific operating system, unlike virtual machines. Instead, they are able to share operating systems and run anywhere.
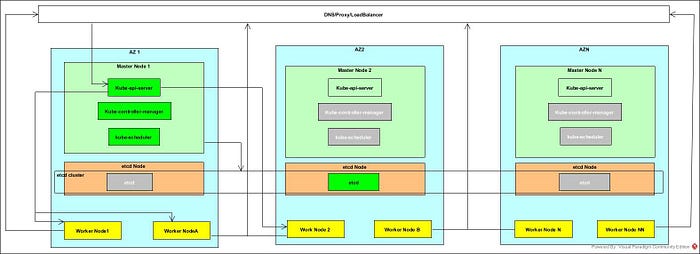
Kubernetes clusters are comprised of one master node and a number of worker nodes. These nodes can either be physical computers or virtual machines, depending on the cluster.
The master node controls the state of the cluster; for example, which applications are running and their corresponding container images. The master node is the origin for all task assignments

Now , start configuring master and worker node ;
First we have to write a playbook for master. You need to do the following steps in the respective playbook.
Steps for the configuration of master in kubernetes cluster:
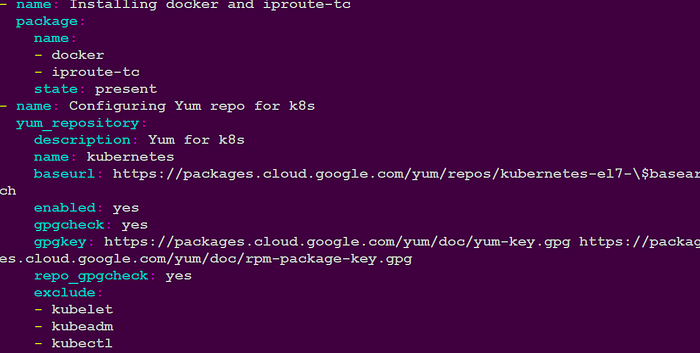
- Install docker (As we are using Amazon Linux 2 image so we don’t need to configure repo for docker).
- Start docker.
- enable docker.
- Configure Kubernetes Repo.
- Install Kubeadm (it will automatically install kubectl and kubelet).
- enable kubelet.
- pull docker images using kubeadm.
- change driver of docker from cgroupfs to systemd.
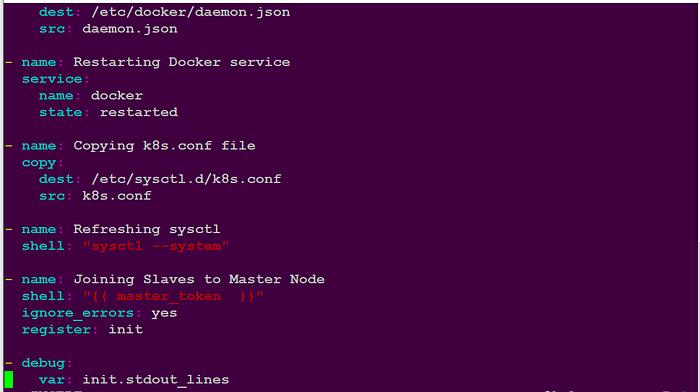
- restart docker.
- Installing iproute-tc.
- Setting bridge-nf-call-iptables to 1.
- Initializing Master.
- Creating .kube directory.
- Copying /etc/kubernetes/admin.conf $HOME/.kube/config.
- changing owner permission of $HOME/.kube/config.
- Creating Flannel.
- Generating Token.
I have created a role inside which i have created a task with all these steps:
command to create a role
ansible-galaxy init <role name>
This is my master role:

My task file:


Now in same way create role for slave and make tasks in same steps,
but in slave we don’t have to initialize , we just have to join the master node using the token provided by the master;
That’s why i print token so that i can copy and paste when slave node need this to join
This is my k8s_slave node task file to join master with all same step of master:


Step 3:
Now , we will use dynamic ip to get all the instance ip and according to their tag name we will run our playbook
In hosts we will use tag name which we will get through dynamic ip;
To get ip dynamically we need to download two file from ansible document
first is ec2.py
https://raw.githubusercontent.com/ansible/ansible/stable-1.9/plugins/inventory/ec2.py
and second is ec2.ini
https://raw.githubusercontent.com/ansible/ansible/stable-1.9/plugins/inventory/ec2.ini
Pre-requisites for these scripts are installing boto and boto3 in the system where you are running the program.
To install boto module
pip3 install boto
pip3 install boto3
we also need to give access key and id
export AWS_ACCESS_KEY_ID='your access key'
export AWS_SECRET_ACCESS_KEY='your secret key'
Now we will get our desired output in this way:
You can see here i get my output “tag_Name_k8s_master” and “tag_Name_k8s_slave”
Step 4:
Now launch wordpress and mysql
I have created role for this and using kubernetes i launched wordpress and mysql
steps for this task
- Launch wordpress
- Launch mysql
- expose wordpress
- Get service and print on screen
- pause playbook for sometime to start service
- and get database ip and print on screen
In this playbook I have written all the tasks:


Now create a role file to run all these playbook and also add that path to configuration file of ansible’
so , i have created role file for all the roles;

This is the playbook to run all the roles , here in host i used tag names and also prompt token to put token for slave to join master
Now in ansible configuratio file i had added this path:

Now the final step to run this playbook , so that all roles will run ,
command to run this playbook is :
ansible-playbook k8s_cluster.yml
Output:
master playbook output
slave playbook output
wordpress and mysql playbook output
Now you can see in above image that our playbook run successfully and k8s cluster configured successfully , and we also launched mysql and wordpress;
We can check also our nodes:
nodes
now we need to run worpress using public ip of master and the port provide by service :
Step 5:
Let’s configure WordPress:
choose language
Welcome note
Configure initial setup
configure username and password
Login to wordpress
Wordpress Dashboard
